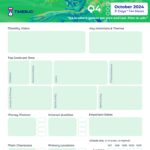
- 5a) Create a Start and End Time (ie. 16 hrs from 10am to 2am). That is your Timebug Period.
- 5b) Start allocating hours to various items in your list to estimate how much time you want or need to spend on each within the Bug. Low/High End (in hours) would be useful, if possible. My tool of choice is Excel for this exercise (if you have the Timebug Excel Template, use the Day Plan tab for this); otherwise, paper is fine, as long as you’re willing to do your own math.
- 5c) Write out a bit more detail (1-2 sentences) on exactly what you would like to achieve in each prong (or tentacle) of the Timebug.
- 5d) Note whether each item is AT (Any Time) or ST (Specific Time) within the Bug. ST items need to enter your calendar – AT items are optional to enter in the calendar, depending on your preference and how specific you want or like to be with your time. I like to have as much flexibility as possible within the Bug, so more AT items are good (for me); for others, too much flexibility can lead to procrastination and a false sense of “free time” – so if that sounds like you, scheduling more of your items could be useful.
6. Now enter a few items (ST especially) in your calendar (Google, Outlook, other). There may be some items already in your calendar, which you need to acknowledge and take into account.
THIS WHOLE PROCESS ABOVE CAN BE DONE IN 15 MINUTES OR LESS; IT CAN TAKE LONGER FOR PLANNING BIGGER BUGS (PERIODS OF TIME).
7. Start!
8. Track and Rebalance as you go along, using your Timebug tools (SHOW HOW via Video, Diagrams – coming in a future entry). I like to check-in (lingo = “Buggin” or “Bug In”) constantly, but that is not always possible. Checking in at least once per three hours is a sensible minimum. Chances are, something took longer or shorter than expected, new demands and distractions propped up, or your “Rebel of Me” (or “Rebel Ego”) made an appearance, to sidetrack part(s) of The Plan. It’s OK. Just keep going, and do the best you can to get back on track or move on to the next item with renewed focus.
9. Close Out the Timebug (lingo = “Bug Out”). Quick evaluation (how did you do? was this productive? how do you feel?); Rollover (Snooze) certain items that didn’t get addressed at all or enough, to another upcoming or future period – OR, throw it back in the Bucket List (i.e. Bucket List = the Wish List or Life List, of items, goals or tasks that doesn’t have a definitive plan or time allocation yet) for future consideration.
10. Start on a new Timebug OR go into Free Flow Mode (where you Consciously choose to have no specific plan or time/task allocations, and instead go with the flow, and see what each moment needs from you; or what you want from those moments).


Leave a Reply